A Plywood A-Frame Cat House on Short Legs
- Hands on
- 240 min
- Start to finish
- 5 hours
- Level
- moderate
- Makes
- one indoor cat house, roughly 420mm square and 420mm tall at the ridge
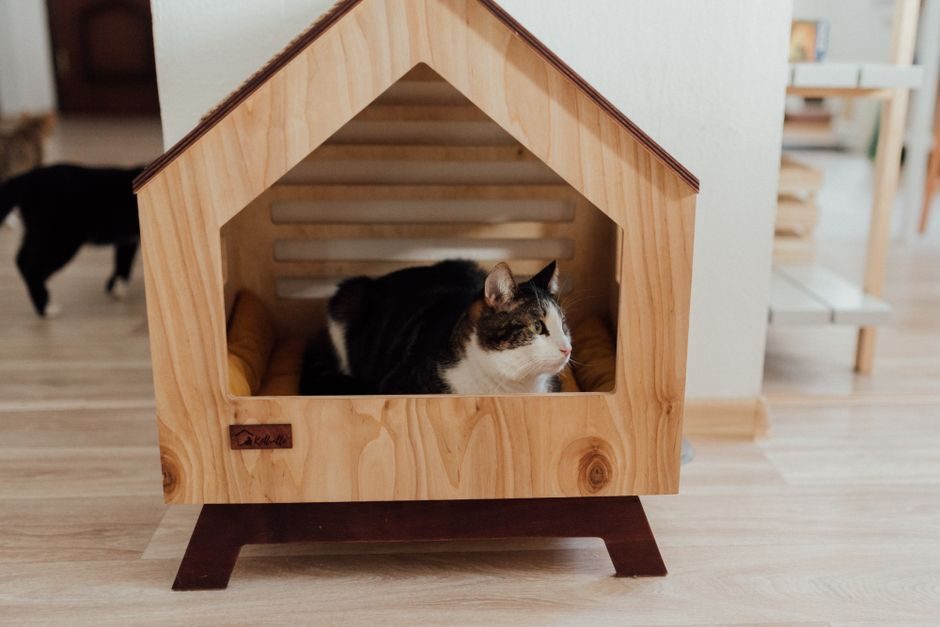
Cats want a den, not a platform: somewhere enclosed, a little above the floor, with one way in. This one is two pentagon-shaped gable ends, a floor, and a two-piece lapped roof, cut from a single half-sheet of plywood and held together with glue, cleats and pins rather than anything more exotic.
What you need
Step by step
-
Mark and cut the 420 x 420mm floor panel from the plywood sheet, guiding the circular saw with a clamped straightedge.
20 min -
Mark out two 420 x 420mm gable blanks, cut them to size the same way, then mark the ridge peak centred at 420mm height and cut the two top corners off each to leave a pentagon.
30 min -
On one gable, draw the doorway: 200mm wide, starting at the bottom edge, with the top curved around something round like a paint tin. Cut it out with the jigsaw, starting from the open bottom edge so there is no need to plunge into the panel.
25 min -
On the second gable, mark and drill three or four 12mm vent holes near the peak for airflow.
10 min -
Cut the two roof panels to 450 x 320mm from what remains of the sheet, guided the same way as before.
15 min -
From the softwood batten, cut two 420mm floor cleats and four 20mm feet blocks.
10 min -
Glue and screw the two cleats to the top face of the floor, flush with the front and back edges.
15 min -
Stand each gable against its cleat, check it is vertical with the combination square, then glue and screw through the gable face into the cleat.
20 min -
Glue and pin the first roof panel along the sloped top edges of both gables, with an equal overhang at each end.
15 min -
Glue and pin the second roof panel so its top edge laps over the ridge of the first, closing the roof.
15 min -
Glue the four feet blocks to the underside corners of the floor and clamp until the glue sets.
10 min -
Sand every edge and the doorway opening smooth, easing all the corners.
20 min -
Apply the water-based sealer or wax in two light coats, sanding lightly between them.
20 min
Afterwards
Vacuum sawdust out of the vent holes and the doorway curve before finishing. Let the sealer cure fully — follow the tin, usually 48 to 72 hours — before letting a cat near it, since cats groom and will chew an edge. Give the glued feet and cleats a firm push to check they're solid before the house goes into use.
Questions
Why not screw the roof straight into the plywood edge?
End-grain plywood edge holds a screw poorly and can split. Glue and pins into the gable face, backed by the cleats underneath for the floor joints, carry the load instead.
Does the doorway have to be this size?
No — widen or reshape it to suit the cat, but keep at least 180mm of width so the gable either side of it stays wide enough not to flex.
Can I paint it instead of using a sealer?
Yes, a water-based paint is fine. Avoid anything solvent-based so there is nothing to off-gas once the cat is using it.
Do the cut plywood edges need anything extra?
Not structurally, but sand them smooth and seal them along with the faces, or the exposed layers will fuzz up where the cat rubs past them.